17 GeoServer
GeoServer is a Web map server, a server application which enables users to implement previously described OGC services. This server application is open source and written in Java. Because it is written in Java, it is operating system-independent (Windows, Linux, Mac OS X, etc.), which contributes to its popularity. GeoServer is documented, tested, improved, and upgraded by a large global community.
This server application enables “servicing” data across widely used protocols for spatial data, such as WMS, WFS, and WCS. It supports popular raster and vector formats such as PNG, GML, SHP, and SVG. GeoServer’s WMS supports the PNG (Portable Network Graphics) format for creating and sharing raster data enabling image compression without significant loss of quality.
GeoServer supports the use of input data sets in various widely distributed formats. For example, data in PostgreSQL/PostGIS spatial databases or data in ESRI Shape or GeoTIFF format can be directly put to GeoServer’s use.
GeoServer is supported by numerous clients and server software:
Open Source Database
PostGIS
MySQL
H2
Open Source Client
OpenLayers
uDig
gvSIG
QGIS
WorldWind
Proprietary Database
ArcSDE
Oracle Locator / Spatial
SQL Server
DB2
Proprietary Client
ArcGIS
Google Earth
Virtual Earth
Safe FME
CadCorp SIS
17.1 GeoServer interface
The GeoServer interface is defined so that all functions are executed from the homepage, which makes it simple to use; even when a function is started, all parameters for further settings are within a single window. The following sections will present explanations to some of the more important spatial data input and manipulation functions in GeoServer. Figure 17.1 shows the GeoServer interface after accessing it in administrator mode.
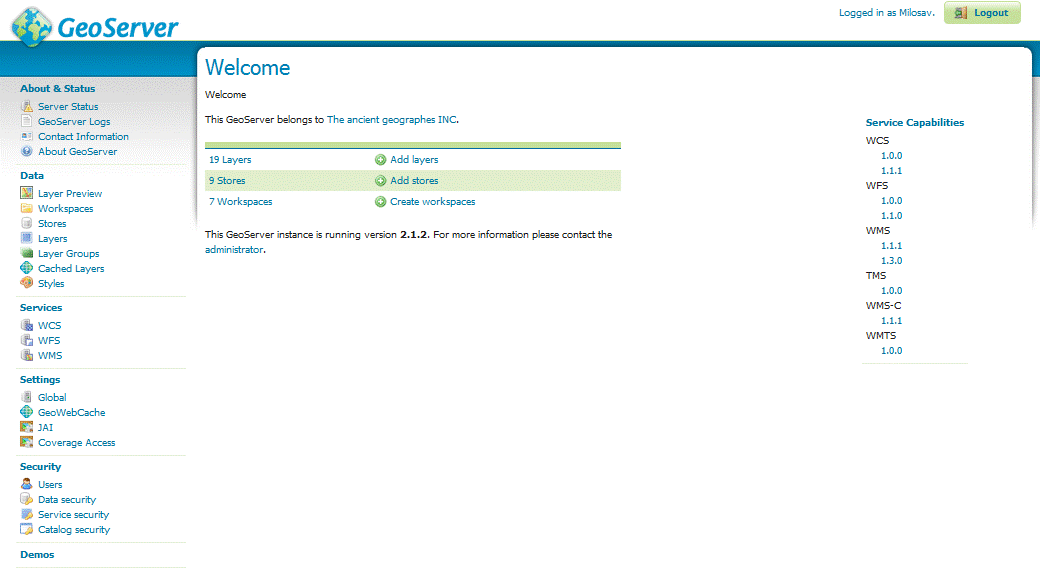
Figure 17.1: GeoServer after access in administrator mode.
17.2 Creating a workspace
GeoServer offers the possibility of creating a new workspace which stores data. Workspaces enable data to be grouped according to some logical rule and to be selected as necessary, enabling easier data search in cases of a large number of files. In GeoServer, in order to create a new workspace or access an existing one, the Workspaces link in the Data tab should be selected. Activating the Add new workspace link, information is entered into the required fields: Name and Namespace URI (Uniform Resource Identifier). The appearance of the page for creating a new workspace can be seen in Figure 17.2.
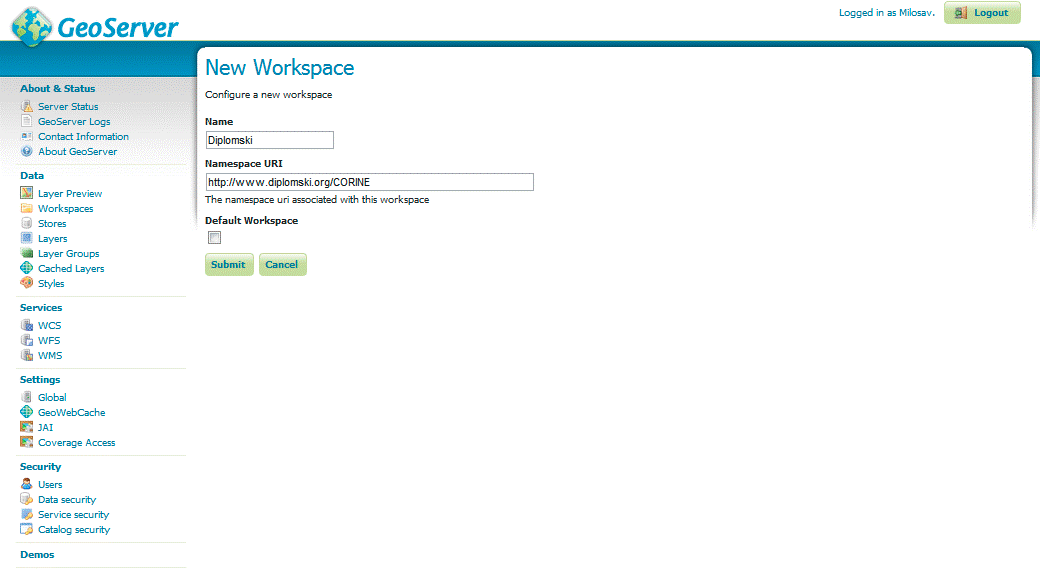
Figure 17.2: Page for creating a new workspace.
17.3 Data storage
Data can be stored in the created workspace. Selecting the Store link (also in the Data tab), opens a page with all data currently stored in GeoServer. This page contains a link for uploading new data – Add new Store. Activating this link opens a page (Figure 17.3) in which the format of the data to be imported is selected. GeoServer supports multiple raster and vector data formats.
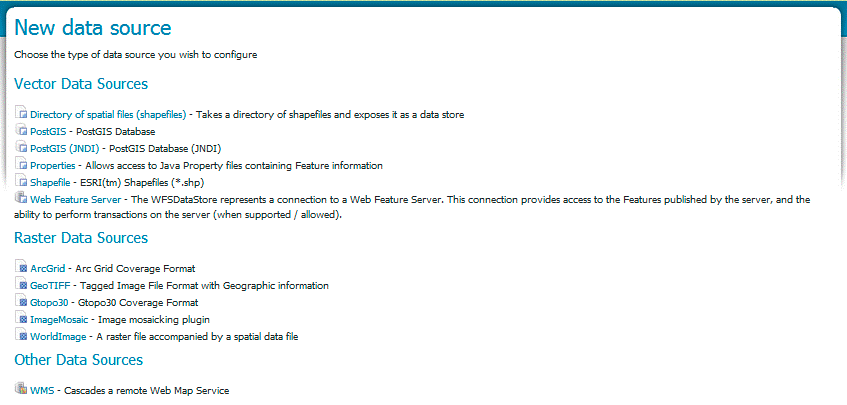
Figure 17.3: Page for choosing data format for storage in GeoServer.
After selecting the data format, a new page is opened (Figure 17.4) for defining additional data parameters.
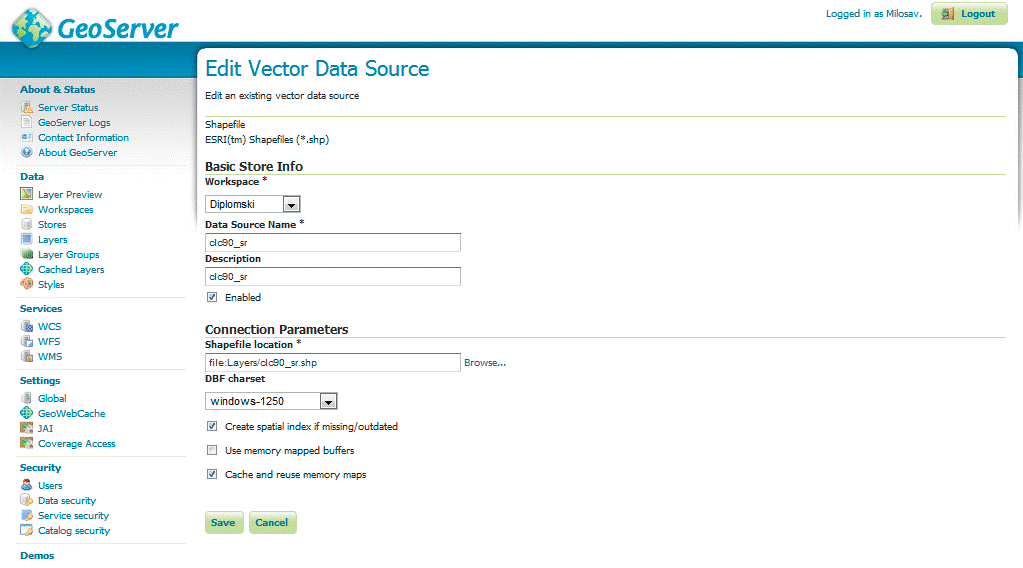
Figure 17.4: Defining parameters for uploaded data..
After defining these parameters workspace in which they will be stored, data labels, data descriptions, paths to folders containing the data, and DBF charset for identifying the character coding used for attribute data, data is stored after pressing the Save button.
17.4 Creating layers and defining publication
For the data to be shown adequately, it is necessary to select the Publish link after entering them, after which the page for creating layers and setting publication parameters will open. This page contains two tabs: Data and Publishing. The Data tab (Figure 17.5) contains the following parameters:
Layer title.
Coordinate reference system.
Coordinates of the minimum encompassing rectangle (by choosing Compute from data, GeoServer uses data to calculate the encompassing rectangle).
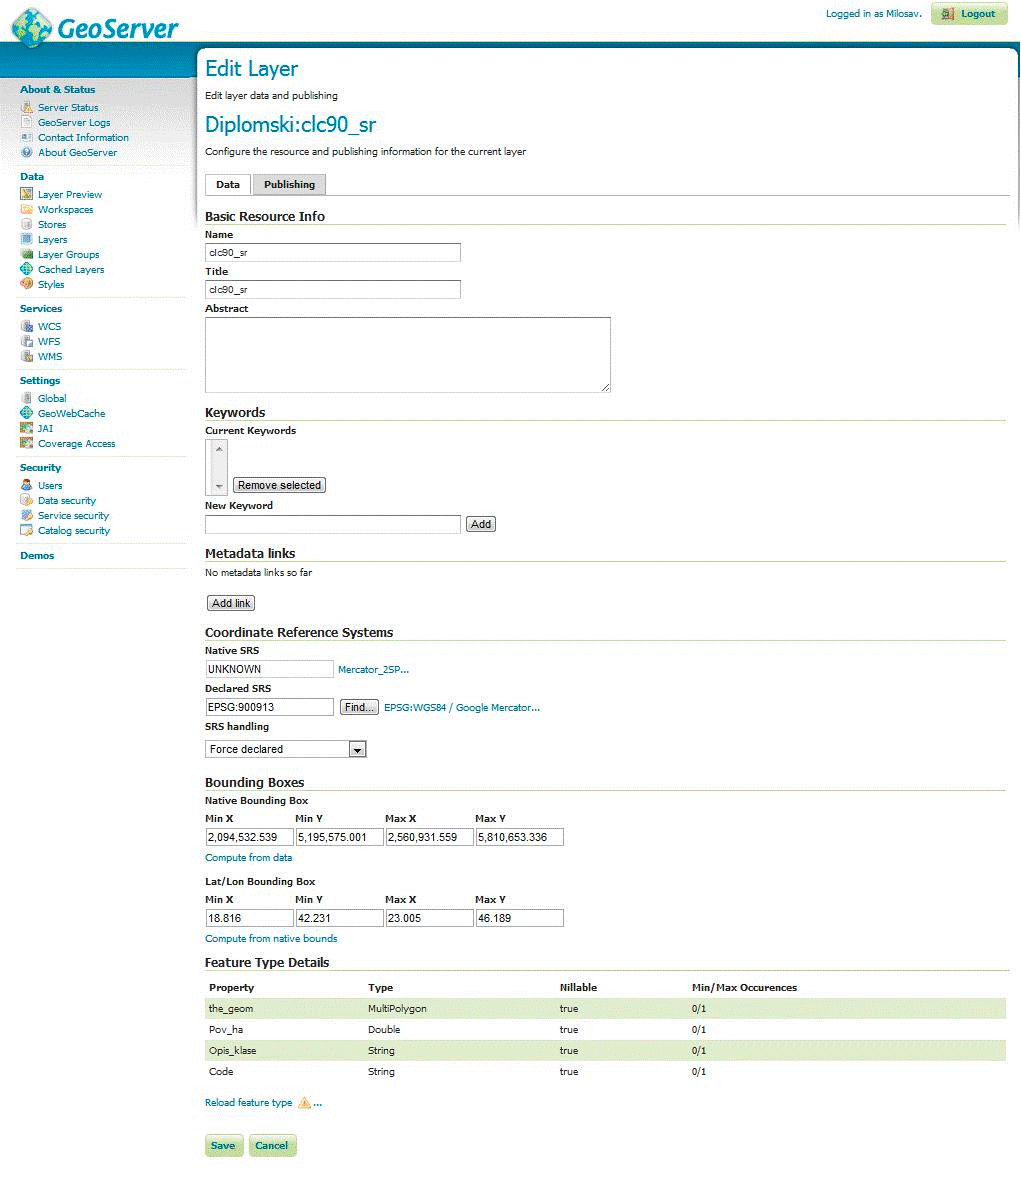
Figure 17.5: Data tab settings.
The Publishing tab (Figure 17.6) contains settings for parameters related to HTTP, WFS/WCS, and WMS settings. Within WMS Settings, the data display style can be defined. Parameter settings in the Publishing tab are not mandatory since, if they are not provided, default settings will be used depending on the data type (point, line, polygon).
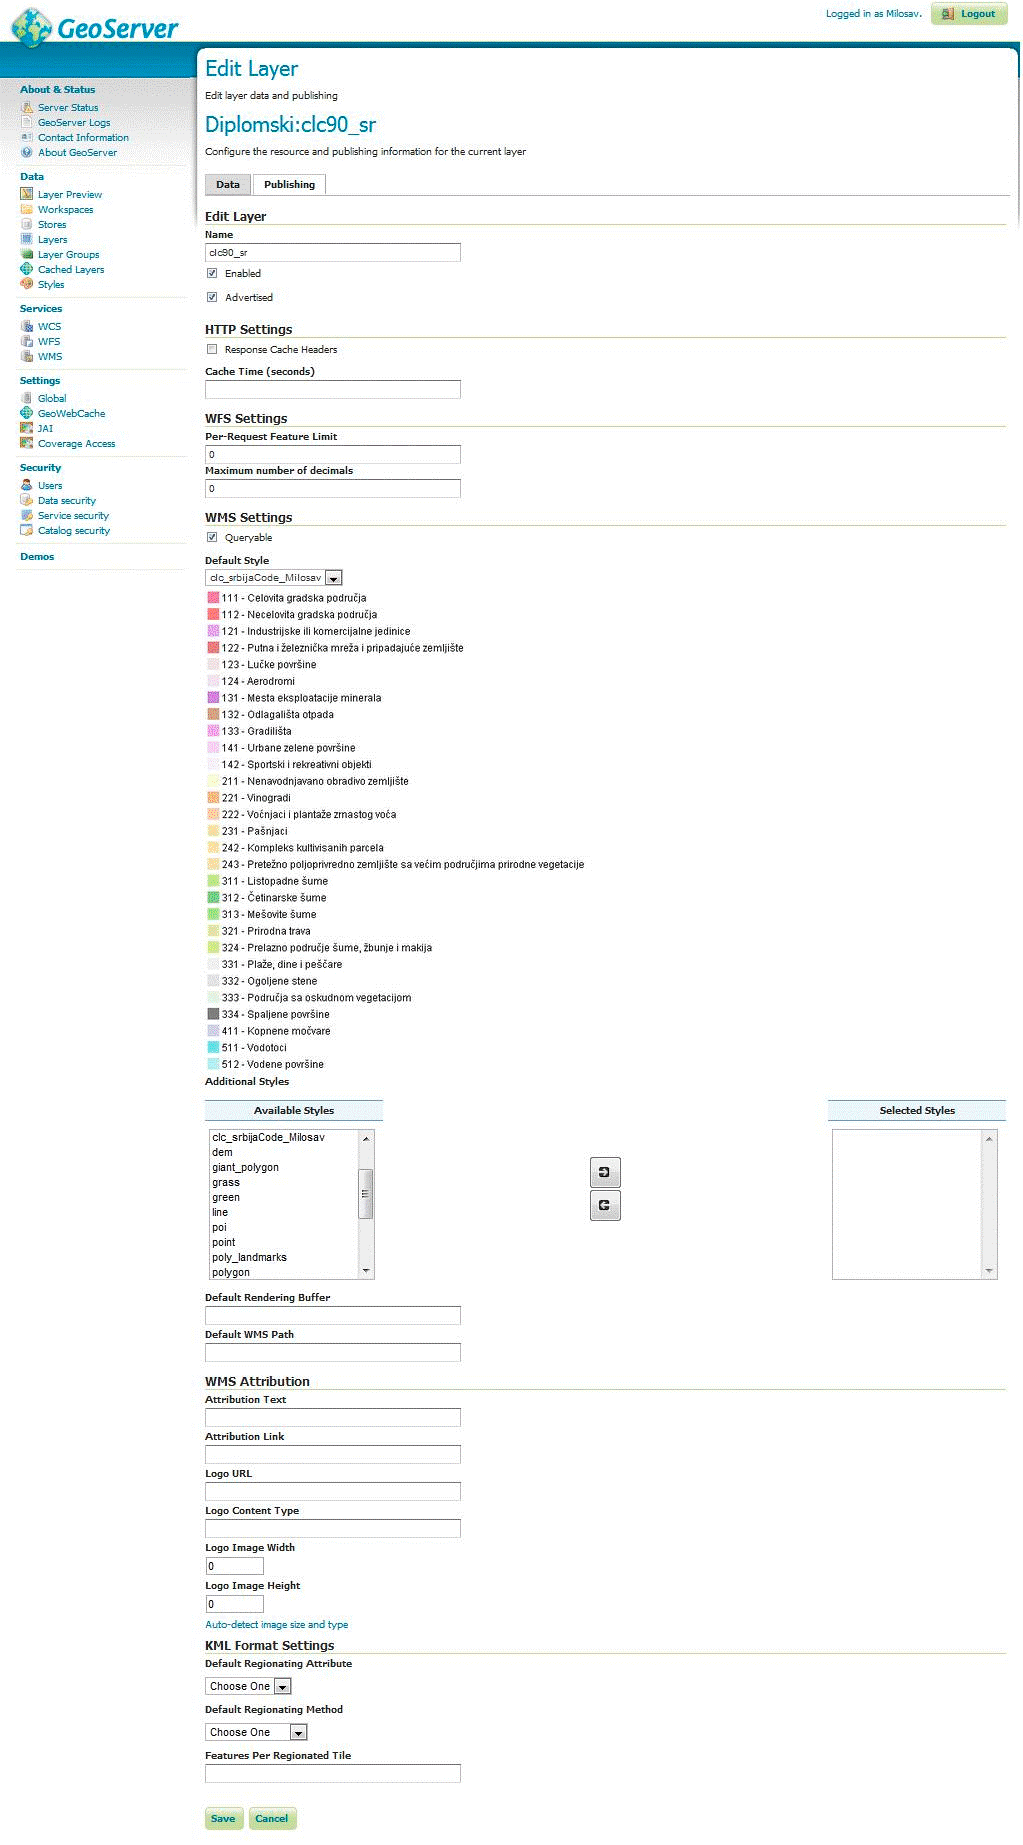
Figure 17.6: Publishing tab settings.
Styles can be chosen from a predefined style sheet, but if there is no style that will adequately cartographically format the data, there is a possibility to define a new style in the form of an SLD file; this will be explained in the following section.
A list of all layers in GeoServer can be found by activating the Layers link in the Data tab (Figure 17.7) and adding new layers from different sources is executed using the Add a new resource link (Figure 17.8).
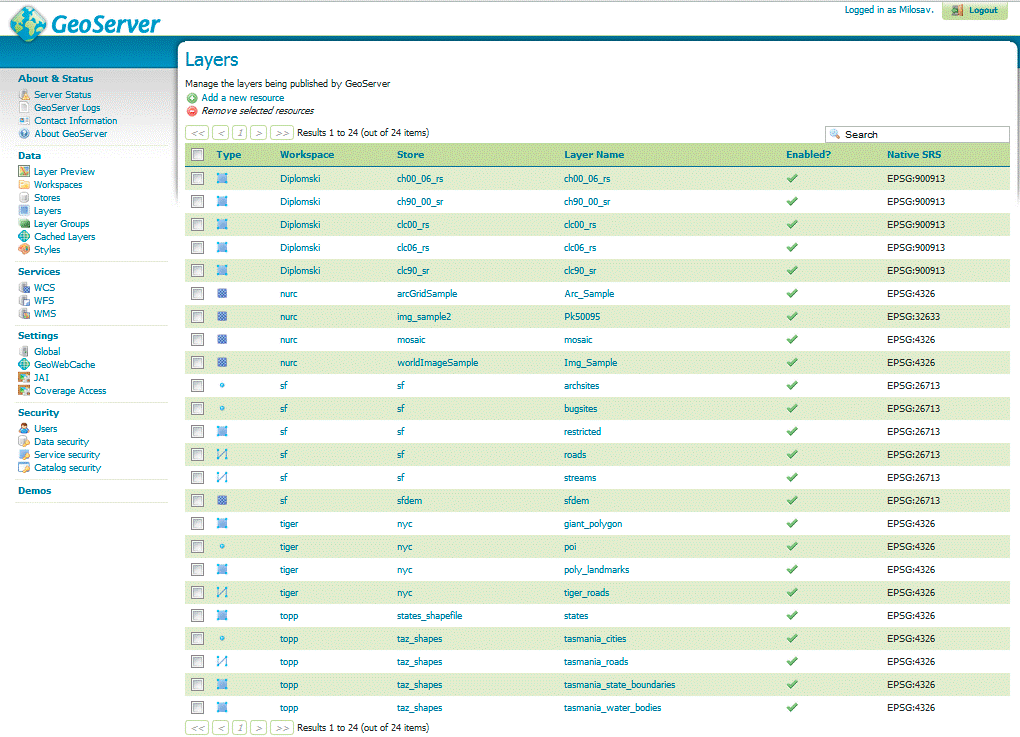
Figure 17.7: List of all GeoServer layers.
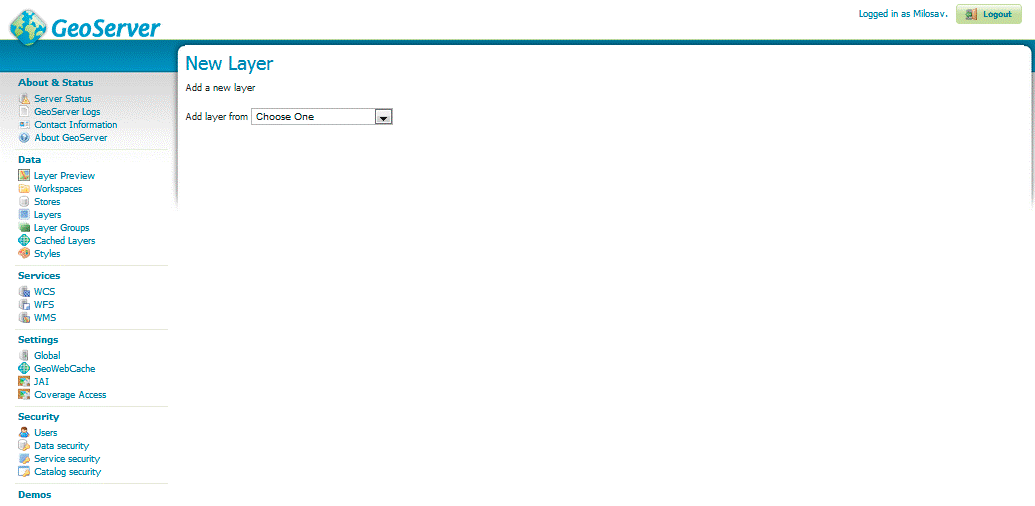
Figure 17.8: Page for choosing a source for creating new layers.
For displaying layers in a format not supported by GeoServer, it is necessary to activate the LayerPreview link (Figure 17.9) in the Data tab, after which a page with all layers is opened. The right side contains a drop-down menu for choosing different data viewing formats, if they are to be viewed directly from the application.
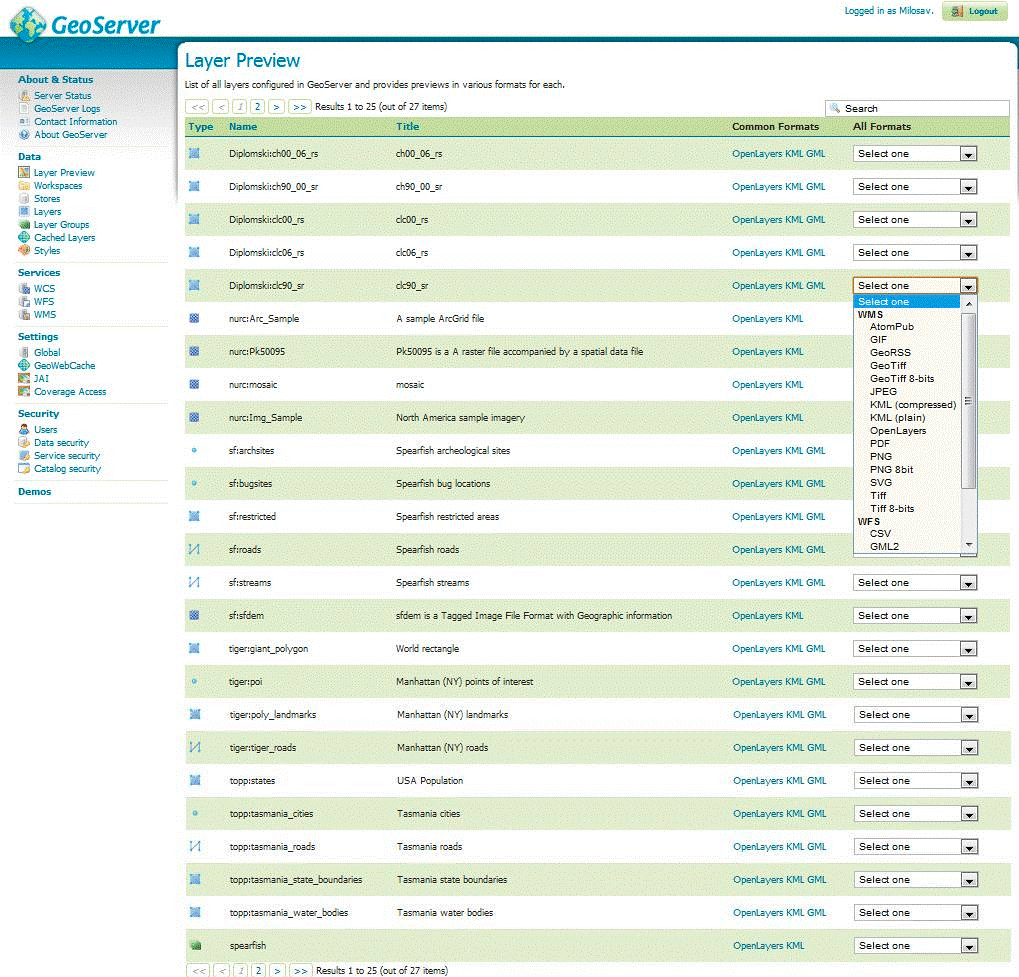
Figure 17.9: Layer Preview page listing all layers.
17.5 Defining layer styles in GeoServer
Activating the Styles link in the Data tab opens a page containing a list of predefined styles, i.e., SLD files already contained in GeoServer. To create a new style, it is necessary to select the Add a new style link which opens the page for creating new styles (Figure 17.10). A new style can be created in several ways:
Chaning an existing style in GeoServer by choosing Copy from existing style from the drop-down list and copying an existing style. The SLD file will appear in the text editor.
A new SLD file can be uploaded from an external source if Choose File is selected, followed by the Upload link.
Creating a new style in a text editor.
After the desired changes to the existing style, loading an external, or creating a new SLD file, by clicking on Validate, it can be checked for errors. The Submit button creates a new style with a defined name.
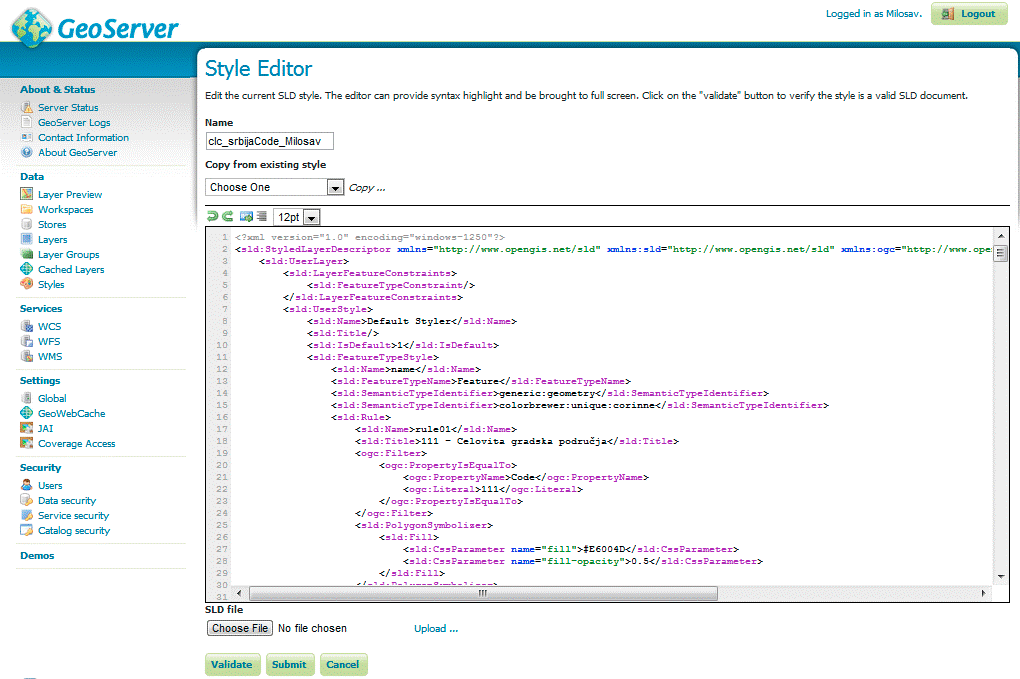
Figure 17.10: Page for manipulating and creating new SLD files.
17.6 Creating layer groups
GeoServer enables the display of several layers on one map. This is achieved by creating a group of layers. Activating the Layer Groups link in the Data tab opens a page where groups of layers can be added or deleted. Adding is performed by the Add new layer group link after which a page opens (Figure 17.11) for adding layers into a group. It is necessary to define the group’s name, coordinate reference system, and minimum encompassing rectangle.
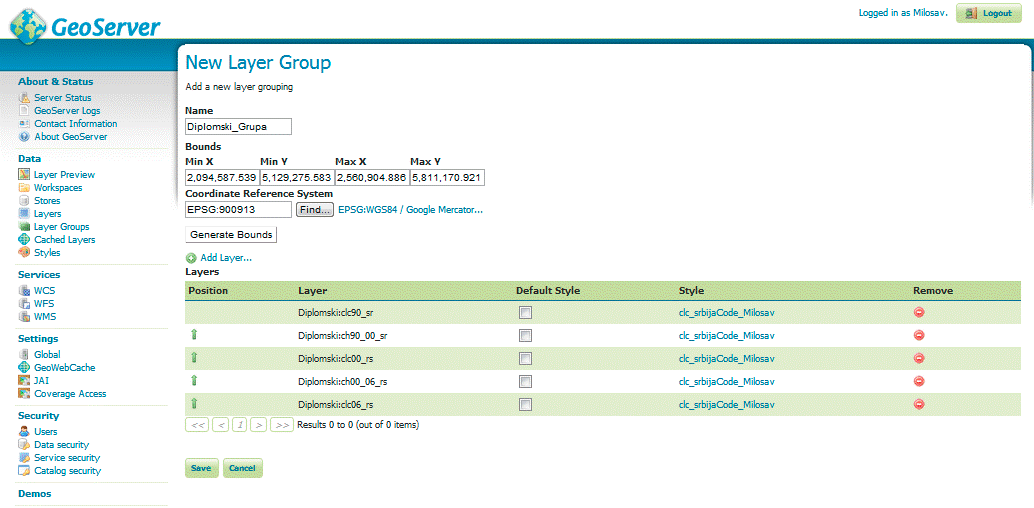
Figure 17.11: Page for adding layer groups.
Advanced users can automatize the process of creating service through the GeoServer REST API; more details at http://docs.geoserver.org/stable/en/user/rest/.